Monday, March 31, 2014

Monday's Watercolor Wonder'ful'

I am glad you are here or returning for another post featuring the Watercolor WonderDSP and Designer Notecards.  Today I am using them to make cards, but come back tomorrow to see the cutest 3D pouch boxes.
  • Quick Tip:  Stamp greeting on Watercolor Paper for a great match in texture and weight when adding layers to the Watercolor Wonder Designer Notecards.

This next card is similar to a card I showed a couple weeks ago.  I made this card first and then copied myself for the other.  When you have a good idea I say "use it again and again."  Why reinvent the wheel?  Both the background paper and the focal panel paper come from the Watercolor Wonder DSP.  The greeting is from the Everyday Occasions Card Kit.  It has been stamped with Whisper White, heat embossed with White EP, and cut using the Chalk Talk Framelits.


Sunday, March 30, 2014

Watercolor Wonder"ful" Week

Hello and welcome to another Monday Montage blog hop. For the next several days I'll be sharing some hand-crafted projects featuring the Watercolor Wonder DSP and notecards.
My first card is backed with a multi-colored chevron pattern paper from the Watercolor Wonder pack of DSP.  The focal point is a Calypso Coral card stock bloom made with the Spriral Flower Die run through the Big Shot.

Quick Tip:  Assemble flower and then pound, smash, and flatten the petals open with a small ball peen hammer.

Quick Tip #2:  Curl the bakers twine by pulling the ends between your finger nails.
My second card is made with one of the Watercolor Wonder Designer Notecards.  If you have not picked up a pack of these beauties--it's time.  The weight and feel of the cards is so appealing.  I simply added a greeting from Everyday Occasions which I heat embossed with White Embossing Powder and cropped with one of the Chalk Talk Framelits.

Do come back later tomorrow for another Watercolor Wonder'ful' post.
from dara gloden
to julie warnick

Tuesday, March 25, 2014

Watercolor Wonder'ful'

How about a sketch challenge to get the stamp mojo flowin'?  We have a perfect sketch for you if you love adding pennants or banner flags to your layouts.  Pop on over to Hand Stamped Sentiments and see what the design team members have created while incorporating this sweet layout.

For my interpretation of the sketch I was in the mood to include the Watercolor Wonder DSP.  The blue and green floral print is gorgeous, I mean GORGEOUS.  It's so perfect for spring and makes for a soothing and soft simple card.
  • Quick Design Tip of the Day - Add Dazzling Diamonds Glitter with a Two-Way Glue Pen to the center of the flowers of the DSP for an extra special touch.
  • Quick Design Tip of the Day #2 - To make pennants appear fuller, adhere them to card by adding one thickness of Stampin' Dimensionals to the top and two thicknesses to the bottom.


Monday, March 17, 2014

Happening Hip Notes

Mix the Happenings Card Kit with Hip Notes stamp set and you get a stack of 15 awesome cards.  The card kit comes with enough to give each card a metal button, a shoestring bow of silver and white twine, a patterned piece of background paper, a greeting banner, a coordinating patterned paper shape, and a splash of silver glimmer paper.  And what card kit wouldn't be complete without envelopes?  This kit has nice heavy weight envelopes sized just right for a perfect fit.
Along with the Hip Notes stamp set the only thing I added to the kit was some glue and Stampin' Dimensionals.  The bits and pieces are all precut and perforated.  You just pop them apart and decide your layout.  Check out my 15 different layouts and enjoy!


Sunday, March 16, 2014

Love Mo(o)re

Howdy everybody and let me say I am glad you are joinin' along with our Monday Montage Blog Hop.  I have some sweet things to share in the next little bit that I made for my future daughter-in-law's bridal shower.  I made several things to set the stage for a fun FUN afternoon luncheon shower.  So, I think I'll start at the beginning--the bridal shower invitation.
I decided to go with a hybrid style invite featuring the Love More digital download for My Digital Studio and the Language of Love stamp set.  My colors were inspired by the wedding colors and Jennifer's love for red velvet cake (more about that later).  The card base is Basic Black card stock with a layer of Fancy Foil Gold vellum.  Every party needs a banner and so do the invitations, so a simple pennant garland was strung across all 40 invites.  The inside layer was all made using the Love More download.  That's a fabulous download and I have used almost every aspect of it.  It's a must if you're planning a wedding.  To make the invitations extra special I added a Fancy Foil Gold vellum liner cut with the Envelope Liner Framelits.
Stay tuned later for a look at the guest book and bridal shower decor.
From Dara Gloden
To Julie Warnick


Thursday, March 13, 2014

Casing Dena

A couple weeks ago I was visiting my friend Dena Rekow's blog and saw the cutest card.  So cute I had to make one for myself and share it with my Technique Time! class.  Those who were at class got to stamp with the Geometrical stamp set and see how perfectly it fits the new Triangle Punch.  Isn't Dena's card totally adorable, sassy, and fun?  

The base of the card is Sahara Sand with a panel of Basic Black.  The Dictionary background image was stamped on Whisper White as were the triangle images.  My ink colors included Jet Black Staz On, Summer Starfruit (long live the starfruit), Strawberry Slush, and Bermuda Bay.  For the final added bit of sass, a tiny flower punched with the Itty Bitty Punch Pack with a Candy Dot center finish the focal garland.

Tuesday, March 11, 2014

Spring Saturated Shades

I am keeping it clean and simple for today's color challenge being hosted by HAND STAMPED SENTIMENTS.  I love the deep saturated hues for this challenge as they are perfect for welcoming spring.  My card base is Very Vanilla, my greeting is from Geometrical, and the embossed pieces of card stock were made with the Arrow TIEF.  And to top it all off I tied the card with twine from the Tag a Bag Kit and then splashed on a few Basic Rhinestones.

Saturday, March 8, 2014

Kaleidoscopin' Out My Stuff for Saturday

Hello and welcome to the last day of "Kaleidoscopin' Out My Stuff" week.  I had tons of fun stampin' and craftin' bunches of things inspired by and made with the Kaleidoscope DSP.  Today I hope you like my 10" x 10" shadow box.
I know everybody says "you should see this in real life, because pictures don't catch the awesomeness of this."  But seriously it is so cool in person.  It's bright, cheerful, colorful, dimensional, textural, and super sparkly.  Don't you just love glimmer paper?
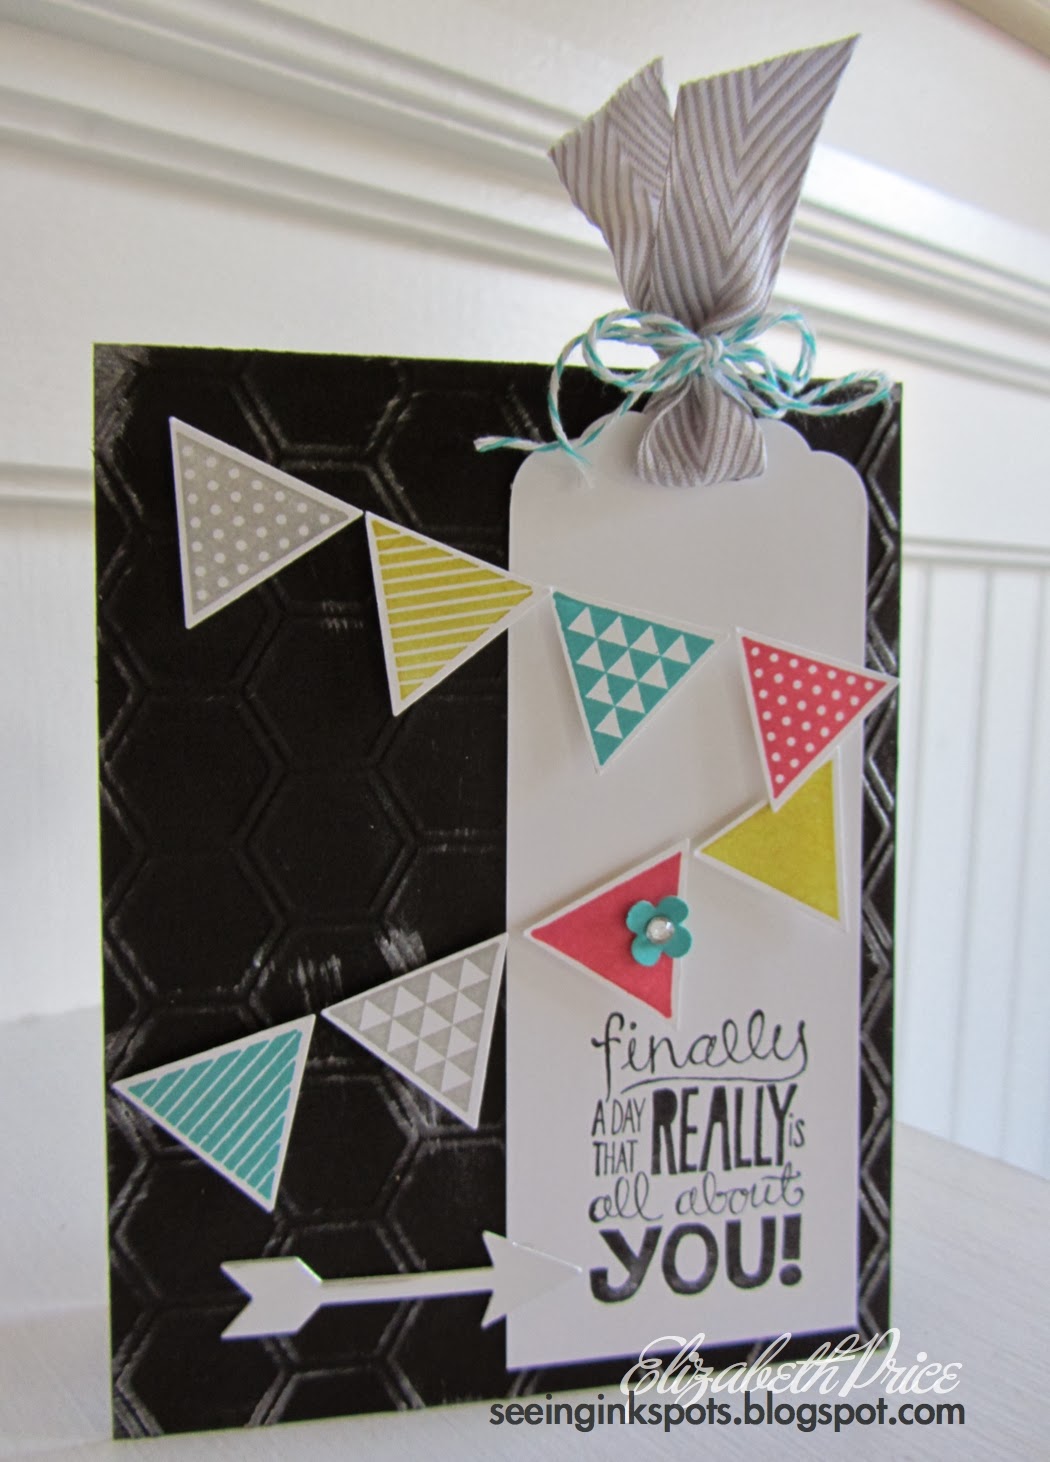
For the greeting I used the Beautiful Today download and My Digital Studio.  I printed the greeting with my home printer at my house, and then I cut it out using the Apothecary Framelits.  To get some mega dimension it is mounted on a piece of cardboard, infact so are the pennants.

The pennants are super easy to make.  Cut four pieces of 2" x 4" Kaleidoscope DSP and then cut them in half from one corner to the opposite corner.  Flip one piece over and layer it on top of the other and you're done.  The flowers are made with the Spiral Flower Die and Regal Buttons.
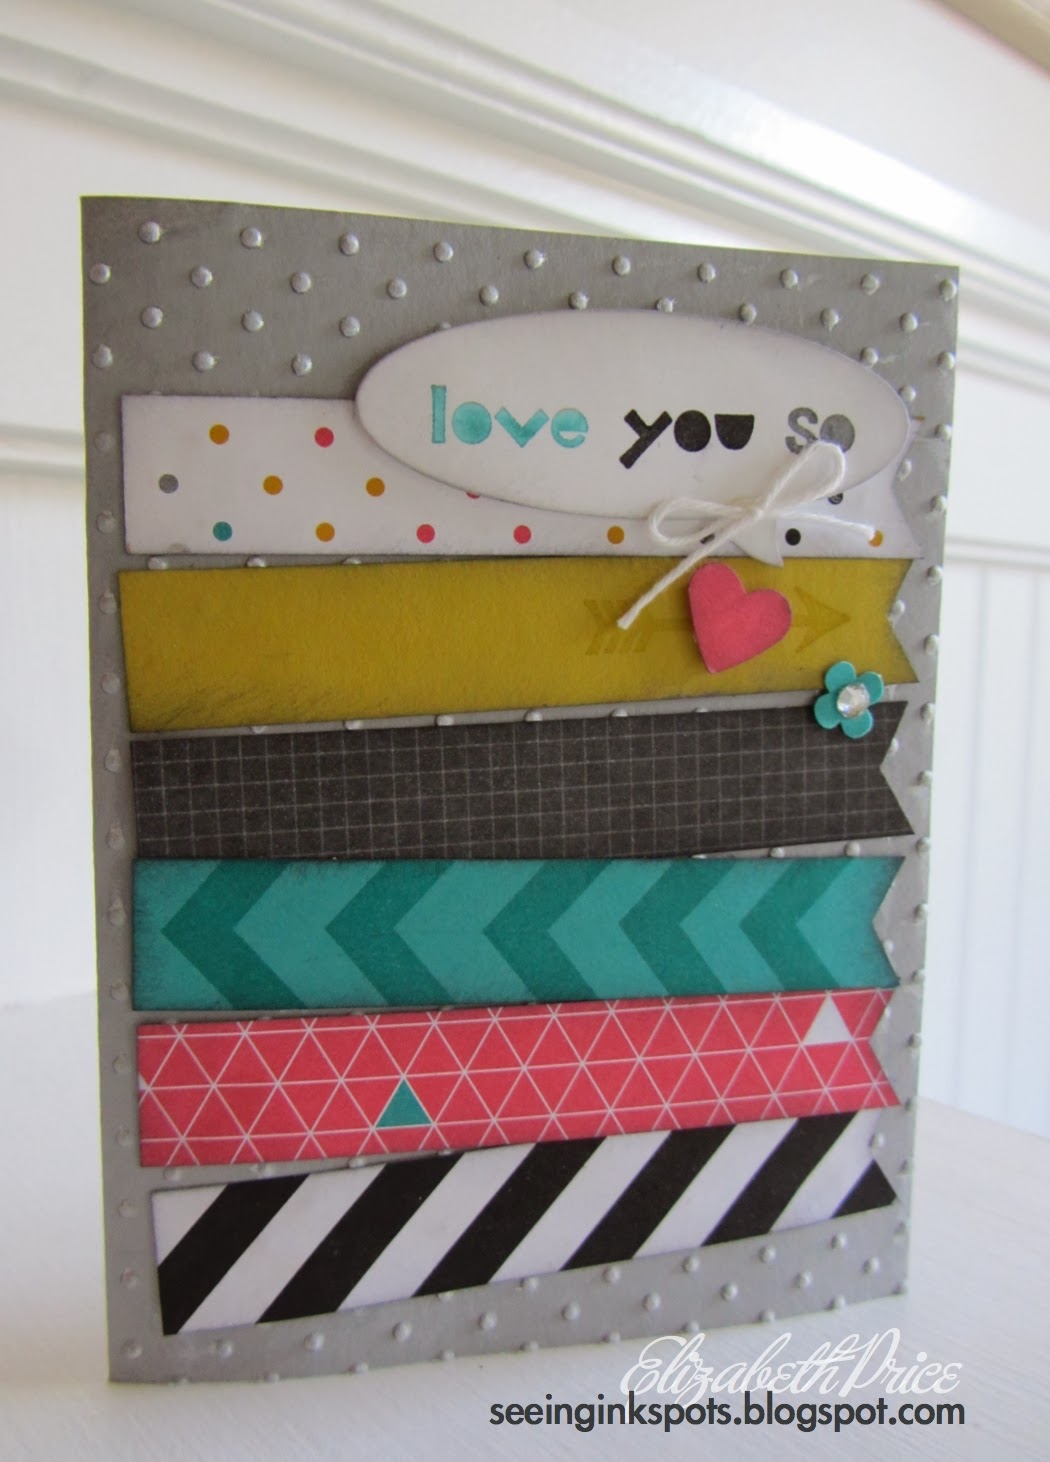
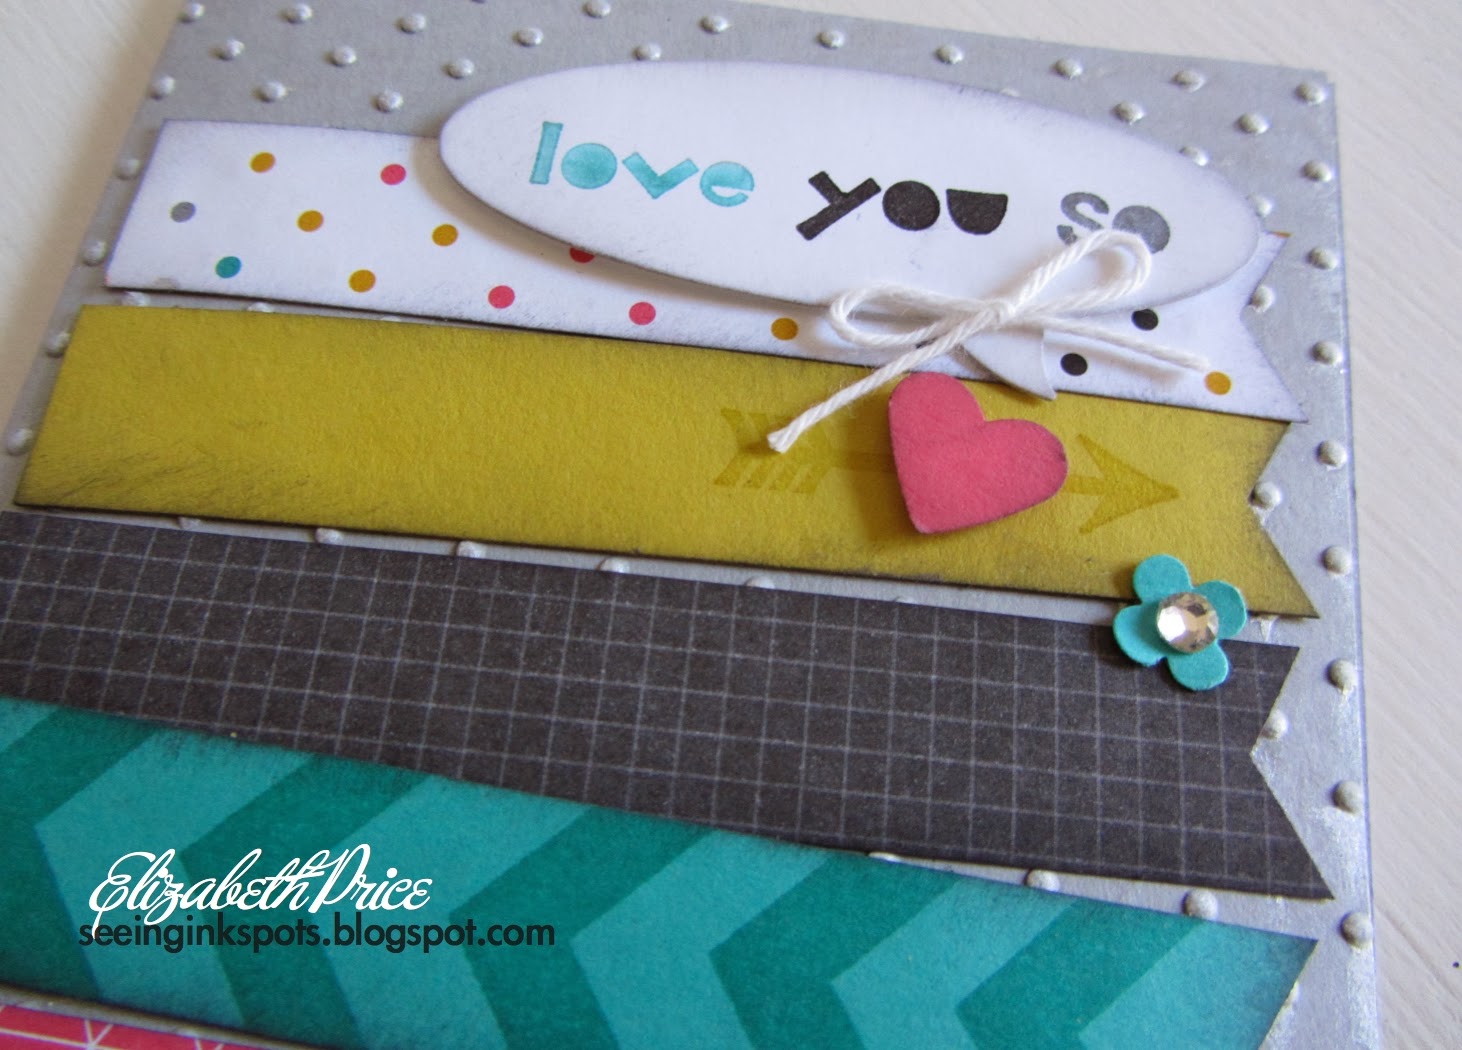
Since I was working in My Digital Studio for the shadow box I decided to also make a quick card.  Lately I seem to be in a flat mood for my cards.  That is crazy for me because I usually like dimensionals everywhere.

Friday, March 7, 2014

Kaleidoscopin' Out My Stuff for Friday

Call them what you want: banners, garlands, bunting, or festooning, you have to call them fun.  They are a blast to create, they spiff up any occasion, and I have made so SO many.  The Kaleidoscope DSP medallions measure 6" across and have 1/2" folds.  Each medallion has a Silver Glimmer Paper layer cut with the Starburst Framelits.
I made the letters in My Digital Studio.  If you haven't added the Beautiful Today Download to your collection you need to get it right away.  It is the BEST and it is also a class--do it, you'll love it.  Anyway, the letters are Basic Grey, were printed on Whisper White, and were cut out using a 2 1/2" Circle Punch.  I added Mini Brads to the polka dots and Dazzling Details to each of the letters.
The smaller circles and pennants all come from Springtime Hello Garland Kit.  I only included the yellow and grey pieces from the kit for this project.

Thursday, March 6, 2014

More Kaleidoscopin' Out My Stuff

Welcome to another day of Kaleidoscopin' Out My Stuff!  I am glad you're here to see a couple simple 3D projects made with Kaleidoscope DSP as my motivator.  If you saw my Monday post I mentioned I was inspired by a blog post at All I Create.  This first project was another that I had to have for myself so I cased Ashley's gift card holder.
I made a very similar gift card holder in my Technique Time! class two months ago and they are quick and easy if you have the Envelope Punch Board.  Just make the smallest envelope listed on the board and assemble with one of the sides as the bottom.  It perfectly fits a 2" wide tag which you can use Mini Glue Dot to adhere a gift card.

Here's a cool mix of Summer Starfruit and Smokey Slate.  I think it's a fabulous color combo and will be sad to have to say goodbye to Summer Starfruit at the end of this catalog year.  The box was cut using the Fancy Favor XL Die and the cello bag inside is from the Twisty Treats Kit, a Sale-A-Bration offering.

Wednesday, March 5, 2014

It's Wednesday, Another Day to Kaleidoscope Out My Stuff

Check these scrapbook pages out!  They are 100% traditional pages made with stamps, papers, and accessories.  I really enjoy making hybrid pages or pure digital books, but I was in the mood to go traditional and so I went for it.
My "love" page is 12" x 12" and showcases a picture of my son and his fiance.  The picture was snapped just before sunset and what I love about the photo are the light bubbles.  We got them by luck, but they were the perfect inspiration for the word bubbles.  I totally enjoyed added more and more, bits and pieces, and hearts galore.  Hearts to show my love for my family :0)
Here's another traditional page, but this one is 6" x 6".  For this page I took out some aggression on the DSP with a sanding block.  And you know what?  It's my favorite part of the page.  Well not really, the picture of Nick and Jennifer is truly my favorite.
Visit tomorrow for a couple 3D projects!

Tuesday, March 4, 2014

Kaleidoscopin' Out My Stuff for Tuesday

It's another day of Kaleidoscope projects that are spirited and HAND STAMPED! My crafty heart belongs to stampin' and paper craftin'.  Check out a few more of my hand made cards featuring Kaleidoscope DSP and the Geometrical Stamp Set.
I love this Basic Black card.  It's star is the colorful garland stringing back and forth.  So cute and simple to put together thanks to the Triangle Punch which coordinates perfectly with the Geometrical Stamp Set.  I also busted out the Scallop Tag Topper Punch and an all time favorite stamp set, Really Good Greetings.  Ya like?

For me this card was fun and it's totally me.  It's grungy, off kilter, unexpected, and totally energetic.  My favorite thing about this card is the tone on tone stampin'.  It's subtle, but it makes the card much more interesting.

Unlike the previous card this one is a bit more clean and simple.  What's cool are the petite wood triangle embellishments from the Essentials Wooden Elements.  I used an Aqua Painter to paint/stain the wood to match my card.  I squished my Strawberry Slush and Summer Starfruit ink pads to collect some ink, picked up the ink with the Aqua Painter, and brushed it on the wood.  I blotted them dry with a paper towel.